

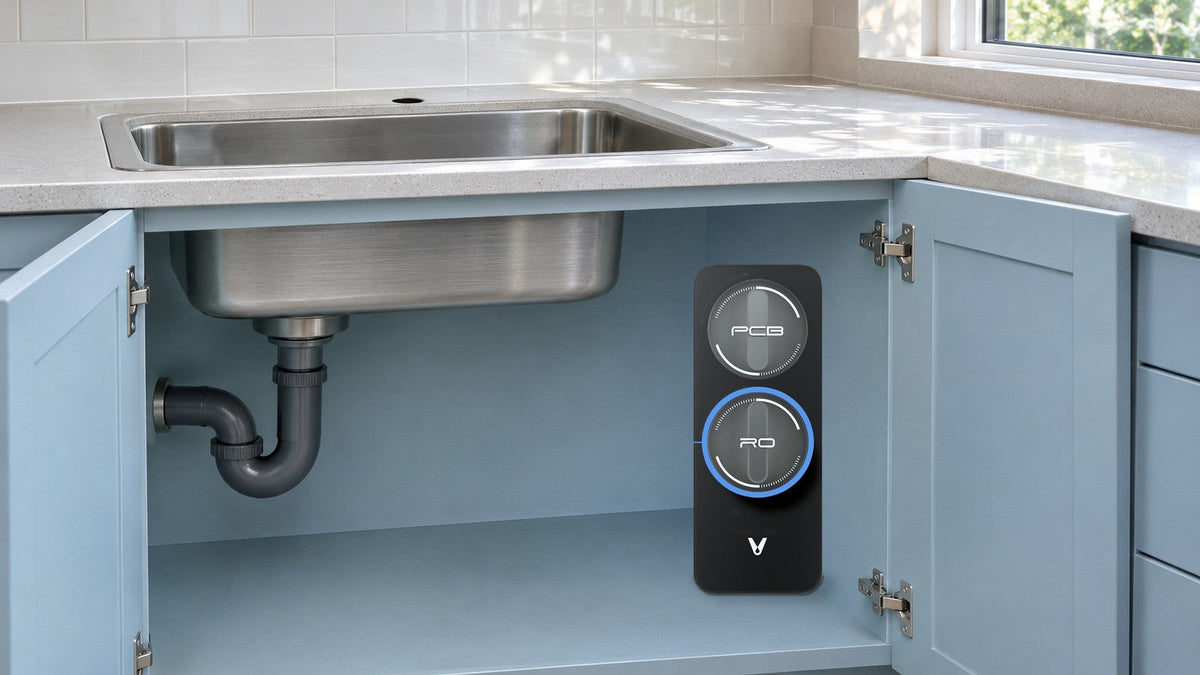
A smart under-sink RO system with step-by-step videos and its installation parts in the box can usually be installed by the homeowner, and a short look under the sink shows how ready the kitchen is. The Viomi V6 PRO suits a first-time installer: its faucet, feed adapter, drain saddle and tubing arrive in the box and a step-by-step video for the model walks through the job from unboxing to setup. The Viomi M1 has its own video and installs in the same four connection stages: feed water adapter, drinking faucet, drain saddle and main unit.
Tools to Have Out Before You Start
The connections themselves call for an adjustable wrench, needle-nose pliers, a tape measure, a utility knife and a flashlight. An electric drill handles the small hole for the drain saddle, and a hole saw or a 1-inch bit comes out only where the faucet needs a new hole; for the Viomi V6 PRO and Viomi V8 PRO, the drain bit is 1/4 inch, and a screwdriver joins the set.
A towel, a small bucket and a phone flashlight for reading labels at the back of the cabinet are worth having within reach as well.
Parts That Arrive in the Box
Opening the box before installation day shows what the job involves. The Viomi V6 PRO and Viomi V8 PRO come with ten kinds of accessories alongside the main unit and the drinking faucet:
- a feed water adapter with its blue inlet tube
- two white purified-water tubes and a gray drain tube
- a drain saddle, a waterproof foam pad and a sticker that marks the drilling spot on the drain pipe
- a tee fitting and a roll of Teflon thread seal tape
- seven 1/4-inch and two 3/8-inch bayonet locking clips
- a damping pad and the power supply adapter
The drinking faucet comes with its mounting hardware, the nut and washer set that holds it to the deck from below. The two cartridges, one RO and one PCB, come installed in the unit, and the Viomi V8 PRO adds a spare PCB cartridge. With the fittings, tubing and clips already matched to the unit, installation day is about connecting the supplied parts.

Readiness Checklist for Your Kitchen
| What to check | Where to look | Ready when |
|---|---|---|
| Cold shutoff valve | Under the sink, on the cold supply line to the faucet | With the faucet's cold side open, closing the valve stops the flow once the remaining water has drained |
| Faucet location | Sink deck or countertop beside the main faucet | There is a spare 1"–1.5" hole, or a spot where a new 1" hole can be drilled |
| Drain pipe | The sink drain pipe below the basin | A reachable section where the saddle can clamp over a 1/4" hole |
| Outlet | Inside the sink cabinet | A standard outlet on a GFCI-protected circuit with constant power |
| Spot for the unit | Cabinet floor | A level, stable area where the unit can stand and the tubes can reach the valve, faucet and drain |
For the faucet row, measure any unused soap-dispenser or sprayer hole across its opening. One that falls in the 1-inch to 1.5-inch range can take the drinking faucet without new drilling.
Connecting It in Order, From Valve to Drain
The installation follows the water from the valve to the faucet and then to the drain. The Viomi V6 PRO, Viomi V8 PRO and Viomi M1 go in through the same four stages in this order; the tube colors below are those of the Viomi V6 PRO and Viomi V8 PRO.
The cold supply comes first. Close the cold shutoff valve, open the kitchen faucet to let the remaining water out, and unscrew the faucet's cold supply hose from the valve. The feed water adapter threads onto the valve, and both the kitchen faucet's hose and the purifier's blue inlet tube connect to it. A wrench snugs each joint.
The drinking faucet goes in next. Feed the faucet's tube and signal wire down through the hole, set the faucet on the deck, and tighten the mounting nut and washer from below. The white purified-water tube pushes into the quick connector under the faucet until it reaches the marked line, and a locking clip holds it there.
For the drain connection, choose a spot on the drain pipe, place the sticker, drill the 1/4-inch hole through the marked point, press the foam pad inside the saddle, and clamp the saddle over the hole. The gray drain tube slides into the saddle's opening and takes its own clip.
At the main unit, three tubes go into three labeled ports: blue into the inlet, white into the purified-water outlet, gray into the waste port, each pushed in to its marked line and secured with a clip. The faucet's signal wire joins the unit's cable with the arrows lined up, and a threaded collar locks the connection. Bundle the tubes and wire, set the unit level, plug in the power adapter, and open the cold valve. Routing the bundle along the cabinet wall, clear of the door and any pull-out bins, keeps the tubes free of pressure once the cabinet is back in daily use.
Pausing the model's video at each connection makes the steps easy to follow along.
Leak Check and First Flush
On the Viomi V6 PRO and Viomi V8 PRO, opening the cold valve and plugging in the power starts the first flush: the rinse runs on its own for 70 seconds, and the faucet display counts it from 1 to 100 so you can see when it is done.
The Viomi M1's touch faucet runs its first flush: choose the 700 oz setting and tap to start each round as the last one finishes, three rounds in all, with the water running down the sink.
Before the water is used, check every joint for leaks: the feed adapter at the valve, the faucet connection, the drain saddle and the three ports on the unit. If a joint drips, close the cold valve and refit that connection, following the video for the model.
Further reading on the weeks after installation, from cartridge reminders to routine care, is in the setup and care guide for under-sink RO.
Pairing the App Once the Water Runs
The "smart" part of the installation comes last. On the Viomi V6 PRO and Viomi V8 PRO, pressing and holding the Select and Reset buttons together for three seconds starts network configuration, and the VIOMI app takes it from there. When the connection succeeds, the unit gives three beeps and the Wi-Fi light stays solid white. The Viomi M1 pairs through the VIOMI app as well, and both connect over a 2.4 GHz home network.
After pairing, the phone keeps a running record alongside the faucet display, including filter life and a reminder when a cartridge is due.
A wider comparison of smart systems sold for self-installation is in a roundup of smart water filter brands you can install yourself.
FAQ
How far should each tube go into its fitting?
Each tube pushes into its quick connector until it reaches the marked line on the tube, and a locking clip then holds it in place. The same rule covers the faucet and the three ports on the main unit of the Viomi V6 PRO and Viomi V8 PRO.
What does the faucet show during the first rinse?
The display faucet of the Viomi V6 PRO and Viomi V8 PRO counts the rinse progress from 1 to 100 and shows the TDS of the water coming out while the 70-second rinse runs.
Which outlet does the purifier use in a cabinet with a garbage disposer?
The purifier takes its own outlet with constant power, separate from the switched outlet that runs the disposer.
Does the app need to be set up before the purifier makes water?
Pairing is a separate step that follows the water connections. The first rinse of a Viomi V6 PRO or Viomi V8 PRO starts at first power-on and the faucet shows its progress and TDS before the app is involved, and the app then adds usage and filter tracking.
What should happen with the first water after installation?
Let the automatic rinse finish on the Viomi V6 PRO or Viomi V8 PRO, or complete the three flushing rounds on the Viomi M1, and let that water run down the sink.
Your Readiness Check in Order
- A few days ahead, open the box and lay the parts out by connection point.
- Gather a drill with 1-inch and 1/4-inch bits, a wrench, pliers, a tape measure, a knife and a flashlight.
- With the faucet's cold side open, close the cold shutoff valve once and confirm the flow stops after the remaining water drains.
- If the sink deck has a spare hole, measure it; if not, mark where the new faucet hole will go.
- Pick the section of drain pipe where the saddle will clamp, with room beside it for the drill and your hands.
- Plan the purifier's plug for an outlet with constant power.
- Watch the video for your model once before starting, then follow it connection by connection on the day.
- Right after the first flush, pair the app on a 2.4 GHz network.
Share:
New York Tap Water: Supply Reports and Building Plumbing
Finding the Right Houston Water Report for Your Address