

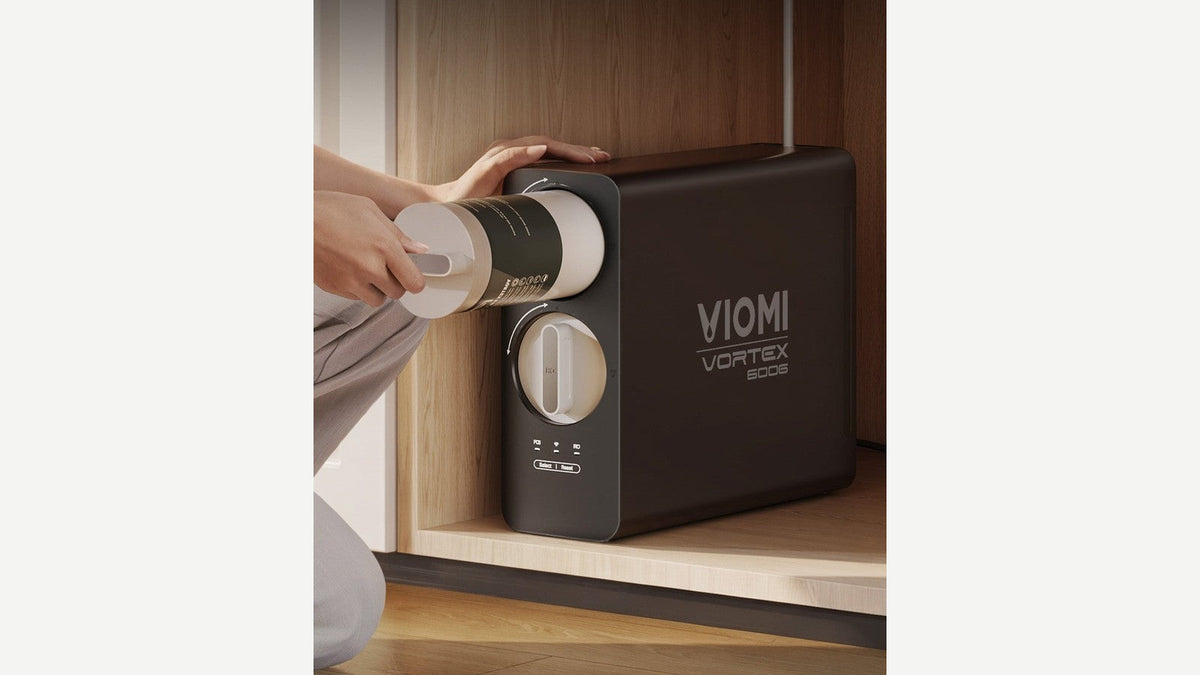
Use the first week to test eight things: the initial flush, leaks at every fitting, tap and purified TDS, the time to fill a known volume, taste, pump and automatic-flush sounds, app pairing and filter-life display, and inlet water pressure and temperature against the manual's range. If all eight land where they should, keep the installation exactly as it is. If one doesn't, the Day 7 table pairs each result with a specific setup adjustment.
The checklist below is written around tankless 9-stage systems such as the Viomi M1, Viomi V8 PRO, and Viomi V6 PRO, using figures from their product pages and user manuals.
The First-Week Test Plan at a Glance
| Day | What to test | What a settled setup looks like |
|---|---|---|
| Day 0 (install day) | Initial flush, leak check, power outlet, Wi-Fi pairing | Flush cycle finished, every joint dry, unit on its own always-on outlet, app paired |
| Day 1 | Second leak check, baseline TDS for tap and purified water, inlet pressure | No moisture after 24 hours, baseline TDS readings logged, pressure inside the manual's range |
| Days 2 to 6 | Tap TDS, morning first-glass TDS, steady-flow TDS, fill time, taste, pump and flush sounds | Steady-flow TDS consistent day to day, fill times repeatable, taste clean, sounds predictable |
| Day 7 | Final leak check, inlet temperature, filter-life display, review the log | Joints still dry and nothing in the log needs attention, so the current configuration stays |
Keep a simple log with columns for date, tap TDS, first-glass TDS, steady-flow TDS, fill time, and notes.
What you'll need: paper towels, a kitchen timer, and one container of known size cover the daily checks. For Test 7, add a screw-on water pressure gauge and a kitchen thermometer (Viomi M1 owners can read feed water temperature in the app instead). The smart faucet and app supply the TDS readings; a handheld TDS meter is a handy extra for tap readings on the Viomi V8 PRO and Viomi V6 PRO before the app is paired.
Before the Week Starts: Setup Details Worth Getting Right
Several first-week results trace back to installation choices:
- Cabinet space: the manuals suggest reserving 20.0 x 12.0 x 20.0 inches under the sink.
- Holes: a 1 to 1.5-inch hole for the smart faucet and a 1/4-inch hole in the drain pipe for the drain saddle clamp.
- Power: an always-on outlet on a GFCI-protected circuit. With a garbage disposer, the purifier needs its own dedicated outlet rather than the switched disposer outlet.
- Water source: municipal tap water.
- Drain line: connected to the sanitary drain through an air gap of at least 1 inch.
Installation takes about 20 to 40 minutes, depending on cabinet space and personal experience, and Viomi's under-sink RO setup and care guide walks through the process.
Test 1: Confirm the Initial Flush Was Completed
- Viomi V8 PRO and Viomi V6 PRO: The first power-on of a new machine triggers a 70-second rinse. During the rinse, the faucet display shows progress from 1 to 100 along with the TDS of the water coming out.
- Viomi M1: Select the 700 oz setting on the faucet and press the dispense icon to start the first round. Each round runs about one minute and ends on its own; press the icon again to start the second round, then the third. Water produced during these rounds is not for drinking.
The Viomi M1, Viomi V8 PRO, and Viomi V6 PRO manuals note that the first water from a new filter may look slightly grayish or contain air bubbles, and that this is normal. Keep running water until it comes out clear. Cloudy water that clears from the bottom of the glass up is trapped air, as Viomi explains in why RO water has bubbles.
What to log: whether the rinse or all three flushing rounds finished, and how many minutes it took for the water to run clear.
Test 2: Leak Check on Day 0, Day 1, and Day 7
The manuals say to place the unit in a safe, stable location, secure all water tubing, and check for leaks before use. The Viomi V8 PRO and Viomi V6 PRO installation steps also have you bundle the tubes and set the unit level.

A dry paper towel or tissue is the simplest leak detector. Press it around each connection point:
- The feed water adapter on the cold water line
- The inlet, purified water, and wastewater tubes where they enter the main unit
- The tube connection under the faucet
- The drain saddle clamp on the drain pipe
Do this right after installation, again after 24 hours, and once more at the end of the week, since a slow drip can take a few cycles to show. If you find moisture, the manuals say to disconnect power and water right away. On the Viomi V8 PRO and Viomi V6 PRO, the installation steps have you push each tube in until it reaches the marked line and lock it with a clip, so at a push-in tube joint, re-seat the tube to that line, re-insert the clip, and test again.
Also run the faucet and watch the drain line: wastewater should discharge whenever the system makes purified water. If nothing comes out, look for a bend, blockage, or loose connection in the wastewater tube. For a drain that keeps running, see Viomi's guide to an RO system that keeps draining, keeping in mind the scheduled flush described in Test 6.
What to log: dry or damp at each joint, on each check.
Test 3: Record Tap and Purified TDS Every Day
TDS (total dissolved solids) is a combined measure of the solids dissolved in water, and most meters and displays estimate it from conductivity. Logged next to tap TDS, it is a quick daily status reading for the system.
- Viomi M1: The touch smart faucet shows both purified water TDS and raw (tap) water TDS, and the app adds the temperature of the feed water.
- Viomi V8 PRO and Viomi V6 PRO: The LCD smart faucet shows purified water TDS, and the Viomi App shows water quality before and after filtration.
Take two purified readings each morning:
- First glass: the first water after the system has sat overnight.
- Steady flow: the reading once the water has run long enough for the number to stop falling.
The Viomi V6 PRO and Viomi V8 PRO manual says that after the machine has been idle, "the TDS value of the initial water drawn will first gradually climb before decreasing," and calls it "a normal phenomenon." The Viomi M1 manual describes the same temporary rise and adds that all of the water has passed through the RO membrane. The steady-flow reading is the one to compare day to day.
The Viomi M1 adds beneficial minerals back after the RO membrane, and the product page notes that this naturally raises the purified TDS reading above standard RO water. A higher number on the Viomi M1 reflects the remineralization stage, not reduced filtration performance, so Viomi M1 owners should track their own steady-flow number rather than compare it with plain RO water.
What a settled result looks like: steady-flow readings that stay consistent from day to day, logged next to your tap reading. If you cross-check with a handheld meter, Viomi explains why TDS meter readings vary between devices.
Test 4: Time How Long It Takes to Fill a Known Volume
Time how long the faucet takes to fill one container, such as a 40 oz pot, at steady flow. Repeat on several days at about the same time.
| Model | Rated production (gallons per day) | Maximum flow rate (spec sheet) |
|---|---|---|
| Viomi M1 | 1000 GPD | 84.5 to 89 oz/min |
| Viomi V8 PRO | 800 GPD | 71 oz/min |
| Viomi V6 PRO | 600 GPD | 53 oz/min |

Viomi's product images show a 40 oz pot filling in about 36 seconds on the Viomi V8 PRO and about 45 seconds on the Viomi V6 PRO, based on Viomi's internal laboratory tests. The manuals explain that RO membrane flow is affected by water quality, pressure, and temperature, and that flow may decrease when the feed water is below 77°F (25°C) or the pressure is low. Similar times under similar conditions give you a reliable baseline; if fill time runs long, start with Test 7.
What to log: container size and seconds to fill.
Test 5: Taste the Water at Different Times of Day
Taste the first morning draw and a glass after the water has been running, and note what you notice.
- If you notice an off-taste after the initial flush, note when it shows up. Viomi's guide to why water can taste different after a filter change covers the usual causes.
- The Viomi M1 adds minerals back after the RO membrane through its remineralization stage, so note how that mineralized water tastes to you.
- Away for more than three days? The manuals say to turn off the power and feed water adapter; on return, run the faucet for at least 10 minutes if there is any odor, or 30 minutes after more than seven days.
What a settled result looks like: a taste you're happy with, consistent between morning and midday glasses.
Test 6: Listen to the Pump and the Automatic Flush
A tankless RO system uses a booster pump to push water through the membrane. The Viomi V8 PRO and Viomi V6 PRO ship with a damping pad to set the unit on.
The Viomi V8 PRO and Viomi V6 PRO also run an automatic flush every 12 hours. The machine opens the inlet valve for 70 seconds, rinses with tap water, and sends it to the drain, without running the pump. A short sound of moving water every 12 hours, when nobody is using the faucet, is likely that scheduled flush.
What a settled result looks like: a steady, predictable pattern of sounds. If you hear rattling, start under the sink: make sure the unit sits level and stable, the tubes are secured and not pressed against the cabinet wall, and, on the Viomi V8 PRO and Viomi V6 PRO, the unit sits on its damping pad.
Test 7: Measure Inlet Pressure and Temperature
Pressure. A screw-on water pressure gauge on a laundry or outdoor hose spigot fed by the same supply is the easiest way to read your home's water pressure. Compare it with the feed water range for your model:
| Model | Feed water pressure | Feed water temperature |
|---|---|---|
| Viomi M1 | 14.5 to 58 psi (0.1 to 0.4 MPa) | 41 to 100°F (5 to 38°C) |
| Viomi V8 PRO / Viomi V6 PRO | 14.5 to 72.5 psi (0.1 to 0.5 MPa) | 41 to 100°F (5 to 38°C) |
Outside the range for your model, the manuals call for a pressure booster or pressure reducer. For high-rise buildings where pressure may exceed 72.5 psi, the Viomi V8 PRO and Viomi V6 PRO manual recommends a pressure-reducing valve.
Temperature. On the Viomi M1, the app shows the feed water temperature directly. On other models, a kitchen thermometer in a glass of cold tap water, taken after the line has run for a minute, gives a useful estimate.
Water quality. The manuals note that if municipal tap water does not meet the required standards (for example, high sediment, turbidity (cloudiness) of 1.0 NTU or more, or excessive residual chlorine), pre-treatment is required before the system. In hard-water areas, Viomi recommends adding a pre-filter and a non-salt-based softener or scale inhibitor ahead of the RO system. Your utility's annual Consumer Confidence Report summarizes water quality information for your supply.
What to log: psi, inlet temperature, and the date.
Test 8: Pair the App and Read the Filter-Life Display

Pair the app on install day. The Viomi V8 PRO and Viomi V6 PRO manual recommends connecting to Wi-Fi right after installation.
- Viomi V8 PRO and Viomi V6 PRO: Wi-Fi is off when the unit leaves the factory. Press and hold Select and Reset together for 3 seconds. Three beeps and a solid white Wi-Fi light signal a successful network connection.
- Viomi M1: After power-on, the Wi-Fi light flashes, ready for pairing in the app.
- Resetting Wi-Fi later: on all three, hold Select and Reset together for 3 seconds.
- All three: Use a 2.4 GHz Wi-Fi network.
Once paired, the app shows the remaining lifespan of the RO and PCB filters and keeps a usage report of water production. Filter lifespan is counted from the installation date, so note that date in your log. Rated filter life:
- Viomi M1: RO filter up to 4 years, PCB filter up to 2 years
- Viomi V8 PRO and Viomi V6 PRO: RO filter 2 years, PCB filter 1 year
When replacement time approaches, the Viomi V8 PRO and Viomi V6 PRO alert you with orange control panel lights 10 to 15 days ahead.
What to log: pairing date, starting filter-life figures, and the install date.
Day 7: Keep the Setup or Adjust It
Read the log in order of priority. This week of checks tells you how the installation and the system are running in your kitchen; questions about specific contaminants in your source water, such as lead or PFAS, are answered by a certified lab test of your tap water. Installation checks come first (leaks, flush, pressure, temperature), then daily-use results (TDS, fill time, taste, sounds), then the app.
Act right away if you find a leak at any point in the week. The manuals say to disconnect power and water immediately, then fix the joint before running the system again.
Keep the current configuration if the log shows a dry setup, a completed flush, in-range pressure and temperature, consistent steady-flow TDS and fill times, a taste you like, predictable sounds, and the app showing filter life.
Adjust the setup if something is off:
| What you saw | Adjustment to make |
|---|---|
| Moisture at a push-in tube joint | Shut off power and water; on the Viomi V8 PRO and Viomi V6 PRO, re-seat the tube to the marked line and re-insert the locking clip as in Test 2 |
| Pressure above the range | Add a pressure-reducing valve on the feed line |
| Pressure below the range | Add a pressure booster |
| Slow fill | Cold feed water or low pressure may reduce flow; log feed temperature and pressure, then compare fill times under similar conditions |
| Grayish or bubbly first water from the new filters | Keep running the faucet until the water runs clear, as the manuals direct |
| Tap water outside the manual's quality requirements | Add pre-treatment ahead of the system |
| Hard water | Add a pre-filter and a non-salt-based softener or scale inhibitor |
| Unit loses power when the disposer switch is off | Move it off the outlet shared with the disposer or dishwasher to its own always-on, GFCI-protected outlet |
| Rattling or buzzing | Level the unit, secure the tubes away from the cabinet wall, use the damping pad on the Viomi V8 PRO and Viomi V6 PRO |
| Wi-Fi disconnected, for example after a router change | Hold Select and Reset for 3 seconds to reset Wi-Fi, then reconnect on a 2.4 GHz network |
Frequently Asked Questions
Which tests matter most if I only have time for a few? Start with the three that concern the installation itself: the leak check (Test 2), the initial flush (Test 1), and inlet pressure (Test 7). A dry setup, a completed flush, and pressure inside your model's range are the foundation the other results depend on.
Why does my first glass in the morning show a higher TDS than later in the day? Viomi's manuals describe a temporary rise in the first water after a period of inactivity, followed by a drop, and call it normal. Use the steady-flow number for day-to-day comparison.
What is the short water sound under the sink when no one is using the faucet? On the Viomi V8 PRO and Viomi V6 PRO, a brief water sound at a 12-hour interval may correspond to the scheduled flush. Every 12 hours the machine opens its inlet valve for 70 seconds and sends rinse water to the drain, without running the pump.
Should I keep logging TDS after the first week? A weekly steady-flow reading builds a long-term record you can compare against at filter-change time, and the faucet display makes it quick.
What Your First-Week Test Results Mean
When all eight tests hold, keep the installation as it is and switch to a weekly TDS note. When one doesn't, make the matching change from the Day 7 table and repeat that test for a few days.
If you're still choosing a system, the smart faucet makes this whole checklist easier:
- Viomi M1: 1000 GPD, 9-stage, 3:1 pure-to-drain, remineralization, and a touch smart faucet showing both tap and purified TDS. The highest rated production of these three models, with mineralized water.
- Viomi V8 PRO: 800 GPD, 9-stage, 3:1, LCD smart faucet, plus an extra PCB filter in the box. The higher-output of the two PRO models.
- Viomi V6 PRO: 600 GPD, 9-stage, 3:1, LCD smart faucet, in the same 16.3 x 5 x 12.8-inch footprint as the Viomi V8 PRO.
Share:
Does a Third-Party Replacement Cartridge Change Your RO System's Certification Claims?
How to Test Pump Vibration and Auto-Flush Noise in a Tankless RO System Near an Open-Plan Living Area