Stuck filter housings turn a simple maintenance task into an afternoon fight with plastic, plumbing, and water pressure. As a smart hydration specialist, I see this issue over and over in homes that genuinely care about water quality. The good news is that in most cases, a “frozen” housing is more about physics and maintenance than a catastrophic failure. If you understand what is happening inside that canister, you can usually free it safely and keep your water system healthy.
This guide walks through why housings get stuck, how to get them moving again without cracking anything, and how to prevent the problem from returning. The focus is on whole-house and under-sink canisters, refrigerator filters, and similar housings used in home hydration systems.
Why Stuck Filter Housings Matter For Your Health And Your Home
A stuck housing is not just a mechanical nuisance. It often signals other issues that can affect both water quality and plumbing health.
Plumbing and water treatment companies repeatedly warn that when filters are not changed on time, cartridges become saturated, strain the system, and can allow bacteria to grow. Practical maintenance guides from Just Plumbing, Mokher Plumbing, and Frizzlife emphasize that neglected filters lead to low flow, leaks, off tastes and odors, and even breakdowns in whole-house systems, reverse osmosis (RO) units, and UV systems. Stuck housings frequently show up in these same scenarios because the cartridge inside has been sitting under pressure, collecting debris, and essentially “gluing” itself to the bowl and O-ring.
The health implications are real. Field research summarized by the University of Georgia’s mechanical filtration guidance explains that mechanical filters trap particles but do not remove dissolved chemicals by themselves, and that some media like cellulose can support microbial growth if left too long. Residential maintenance articles highlight that saturated filters can become breeding grounds for bacteria and biofilm, particularly if they are made of paper-based media. Frizzlife’s maintenance guide explicitly recommends choosing non-biodegradable media where possible and cleaning or replacing cartridges whenever a noticeable pressure drop occurs, rather than relying only on time or gallon ratings.
This matters even more if you rely on filtered water for vulnerable uses, such as rinsing respiratory devices. A patient question discussed on a Mayo Clinic community board illustrates the concern: the user wondered whether whole-house or refrigerator filters were “good enough” to replace distilled water for cleaning nebulizers. No clinical answer was provided in that discussion, but the underlying point is important. Household filters are not designed to guarantee sterile or bacteria-free water for medical equipment, especially if their cartridges or housings are stuck and overdue for replacement.
There is also a property risk. Maintenance pieces from Just Plumbing, Mokher Plumbing, Palm Beach Water Purification, and others repeatedly connect poor maintenance to leaks and system damage. When homeowners over-tighten a bowl trying to stop a slow drip, or when an O-ring is dry and pinched, the housing may seize now and crack later. That crack can turn into a hidden leak on a weekend away.

So when a housing refuses to budge, treat it as a red flag, not just a stubborn piece of plastic. You want to free it, inspect it, and bring the whole system back into a healthy maintenance rhythm.
What Is Actually Stuck? Housings, Bowls, And Cartridges
Before you tackle the problem, it helps to name the parts.
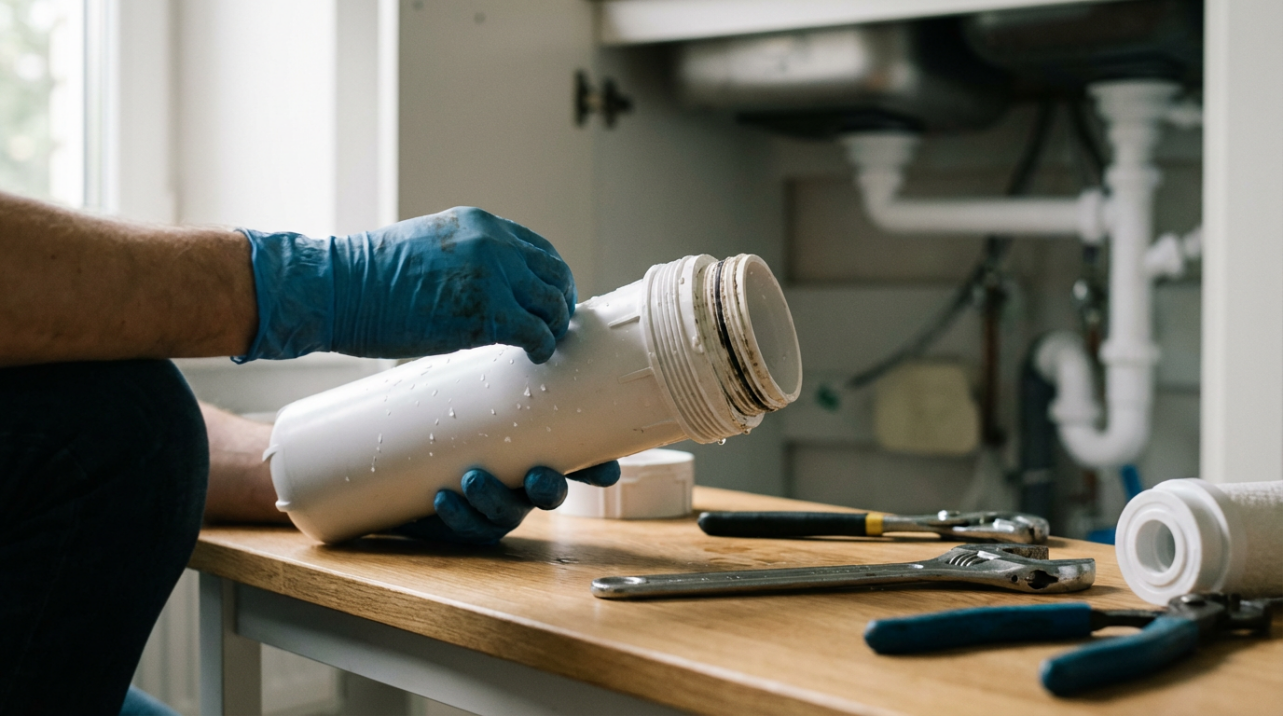
In most whole-house or under-sink systems, water enters a head or cap mounted to a bracket. Hanging from that head is a bowl or canister that unscrews. Inside that bowl sits the filter cartridge. The cap usually contains the inlet and outlet ports, and sometimes an air or pressure release button. The bowl forms a seal against the cap using an O-ring, typically a rubber ring sitting in a groove.
When people say “the housing is stuck,” they can mean at least two different things. Sometimes the entire bowl will not unscrew from the cap at all. Other times the bowl comes off, but the cartridge inside is jammed to the center post or wedged in the bottom of the bowl and will not come out.
Manufacturers like Boshart and Quality Water Lab distinguish between those scenarios because the root causes and remedies differ. A seized bowl is usually a combination of pressure, friction, and damage at the threads or O-ring. A stuck cartridge is usually due to debris, swelling of carbon media, misalignment, or a gasket that stayed behind from the last filter.
Refrigerator filters behave differently. Whirlpool’s support material describes several common designs: quarter-turn grille filters near the base, push-button grille filters, and internal filters behind a compartment door inside the fridge. Here, the “housing” is built into the appliance; the part you handle is a replaceable cartridge with its own internal seals. These cartridges can also seize because of pressure, misalignment, or door clearance, but you do not have a large external bowl to unscrew.
Pitcher filters and some countertop systems introduce one more variation: a small plastic cartridge pressed into a receptacle. Articles from Water Filter Guru and other consumer-focused sites note that these cartridges can stick because of mineral deposits and tight friction fit.
Despite the different formats, the underlying theme is the same.

Water pressure, debris, and seals work together to hold components in place. If you reduce the pressure, understand which parts actually rotate, and respect the limits of plastic, you have a much better chance of freeing them safely.
Why Filter Housings Get Stuck: Pressure, Parts, And Physics
Several well-documented causes show up again and again in manufacturer guidance and independent water quality resources.
Built-up internal pressure is one of the leading reasons a housing feels “welded” to the cap. Quality Water Lab notes that a stuck whole-house canister is often just a pressurized canister. Boshart’s bowl removal guidance and multiple appliance guides recommend shutting off water, opening a downstream faucet, and using an air or pressure release button before turning anything. Household water pressure is often around a few dozen pounds per square inch; if you try to twist a bowl against that trapped pressure, it fights back like a compressed spring.
Overtightening is another key culprit. Boshart warns that many homeowners crank bowls far beyond what is needed. Their recommendation is typically hand-tight, then roughly an eighth to a quarter turn with a wrench, only adding more after depressurizing if a small drip persists. Quality Water Lab, Water Filter Guru, and several consumer troubleshooting pieces echo that overtightening is a top reason housings seize. The threads compress, the O-ring flattens, and friction skyrockets over the months.
O-ring problems are a third major factor. Boshart lists lack of lubrication as a primary cause; a dry O-ring grabs onto the plastic and effectively glues the bowl and head together after four to six months. They also highlight the danger of petroleum-based lubricants such as petroleum jelly, which can swell the O-ring and dramatically increase pressure between the bowl and body. Quality Water Lab recommends food-grade silicone grease instead, and suggests inspecting and replacing O-rings that look dried, pinched, or warped.
Sediment and carbon buildup also play a big role. University of Georgia’s mechanical filtration work explains that during normal operation, particles collect on the filter media and form a “filter cake.” This cake improves fine-particle capture but also increases resistance to flow. If a sediment or carbon filter is left in service long after it should have been replaced, this cake can thicken and extend into the contact points between cartridge, bowl, and center post, essentially gluing them together. Quality Water Lab notes that carbon cartridges may even crack and release fine black dust that packs around the housing and makes removal harder.
Cold temperatures can literally shrink the housing around its threads. Quality Water Lab points out that in unconditioned garages and basements, plastic housings contract in cold weather and water inside can even freeze, creating what they call an “icy lock.” In those cases, the plastic and water are holding the threads tighter than usual until they are warmed back to normal.
Mechanical damage and misalignment create a final category. Stripped threads, cracked caps, misaligned cartridges, and compacted leftover gaskets can all jam the bowl. Both Boshart and Quality Water Lab explain how a lower cartridge gasket that detaches and stays in the bowl can trick homeowners into over-tightening to stop leaks, which then compacts the gasket and makes future removal extremely difficult. Misaligned cartridges inside the bowl can press sideways against the housing, especially under pressure, which adds to friction when you try to turn the bowl.
When you put all of this together, a stuck housing is usually not a mystery.

It is the predictable outcome of pressure, overtightening, O-ring issues, debris, cold temperatures, or damaged parts. That is the bad news. The good news is that each cause suggests a prevention strategy and a safe way to work the housing loose.
Safely Freeing A Stuck Whole-House Or Under-Sink Housing
The safest approach is methodical. Rushing straight to big metal wrenches or extreme heat is how housings crack and systems fail. Manufacturer and plumbing guidance converge on a sequence that starts with safety and escalates gently.
Making The System Safe And Depressurizing
The first move is always to eliminate pressure. Boshart and Quality Water Lab both emphasize that this step is non-negotiable.
Close the shut-off valve feeding the filter. If you have separate inlet and outlet valves, close the inlet, leave the outlet open, and open a downstream faucet so water can flow out. This relieves the trapped pressure in the housing. Many whole-house canisters and under-sink heads include a small air or pressure release button, often red. Press and hold this until water stops spurting. Boshart suggests using this as a check: if pressing the button still releases a strong spray, the system is not depressurized yet.
A simple way to visualize pressure relief is to time how long water runs from a connected faucet after you shut off the supply. If water gushes at full force for more than a few seconds, there is still stored pressure and volume upstream of the filter. Once it slows to a drip, the housing and nearby piping are largely at atmospheric pressure and much safer to work on.
If you skip this step, you are not just fighting pressure.

You risk having the bowl blow off suddenly or deform under force, which can damage the housing or bracket and release water unexpectedly.
Checking Direction And Using Your Hands First
Once pressure is relieved, confirm which way the housing unscrews. Boshart reminds homeowners to apply the familiar “righty-tighty, lefty-loosy” rule while keeping orientation in mind. When you are looking up at a bowl from below, turning it counterclockwise usually loosens it. If the housing is mounted sideways, visualize the threads so you do not accidentally tighten a stuck bowl even further.
Start with your hands. Water Filter Guru recommends using good-grip rubber gloves so your fingers do not slip as you apply steady torque. Grip the bowl near the top, close to the threads, rather than at the very bottom where you can flex the plastic. Use slow, controlled pressure instead of quick jerks. Sometimes, after proper depressurization, this alone is enough to break the initial grip.
A small trick that Quality Water Lab recommends is to give the bowl the slightest turn in the tightening direction before turning it back to loosen. That tiny motion can help break the static friction at the threads and O-ring.
If the bowl still will not move with reasonable hand force, it is time to add leverage, not brute force.
Adding Controlled Leverage Without Breaking The Housing
Most whole-house and under-sink systems ship with a plastic filter wrench shaped like a large ring with a handle. Water Filter Guru advises using this first because plastic wrenches are less likely than metal tools to distort or crack the housing. Slide the wrench around the bowl near the top, make sure it is fully engaged, and apply even pressure.
If you need more torque, Boshart suggests a few controlled approaches. One is to add a short extension to the plastic wrench handle, such as a length of pipe slipped over it. Another is to use two wrenches at once, with handles offset and pushed in opposite directions, so forces are more balanced between the housing and bracket. Their goal is to increase torque while spreading it across the plastic, rather than concentrating it in one spot.
There are also strap-style wrenches and oil-filter-style ratcheting tools on the market. Boshart and Quality Water Lab describe adjustable belt strap wrenches and ratcheting oil filter wrenches that can wrap around the housing and provide strong but evenly distributed grip. A strap wrench with a rubber or nylon strap is especially useful when clearances are tight or when the original plastic wrench has broken.
Channel-lock pliers and other metal tools can be tempting, but they come with risk. Appliance and plumbing guides including Whirlpool’s refrigerator filter instructions and several stuck-filter articles caution that excessive force from metal tools can crack the housing or damage internal components. If you choose to use them, cover the bowl with a thick cloth to distribute pressure and always increase force gradually.
Some consumer resources such as Water Filter Guru and FL Pure H2O mention using mild heat to help loosen stuck connections. For example, they describe wrapping the housing joint with a hot towel or briefly warming it with a hair dryer to expand the plastic and relieve the seal. Boshart, on the other hand, explicitly warns against using heat on plastic bowls because heating can promote stress cracking, especially in clear housings. When a manufacturer gives a clear warning, it should take priority. If your specific housing brand advises against heat, treat heat-based tricks as off-limits and rely instead on careful leverage, lubrication, and component replacement.
Freeing A Cartridge That Is Stuck Inside The Bowl
Sometimes the bowl comes off easily, but the cartridge inside will not move. Quality Water Lab suggests a few practical techniques. One is gentle rocking with needle-nose pliers on the cartridge’s lower edge, fully expecting to discard that cartridge once removed. Another is soaking the cartridge and bowl in warm, soapy water for several minutes to loosen debris and accumulated fines around the contact points.
For cold or possibly icy housings, brief warming of the bowl in a basin of warm water can bring the plastic and trapped water back toward room temperature, reducing contraction and releasing the “ice lock.” Quality Water Lab recommends patience here rather than force; a few minutes of warming can do what a lot of torque cannot.
Always inspect the bottom of the bowl and the head for stray gaskets or pieces of the old filter. As Boshart notes, a gasket that detached from the bottom of the cartridge and stayed behind can flatten over time, cause leaks, and lead homeowners to over-tighten in an attempt to stop the drip. Once you pull everything apart, remove any extra gaskets so the new cartridge seats properly and the bowl does not need excessive tightening.
Knowing When To Stop And Call A Professional
Several maintenance-focused plumbing firms emphasize a conservative principle: stop before you break something you cannot easily replace. Remedy Plumbing, Mokher Plumbing, Palm Beach Water Purification, and Safewell all recommend involving a licensed plumber or water treatment professional when basic troubleshooting fails or when there are signs of leaks, cracks, or complex well and whole-house issues.
Signs you have reached that point include visible hairline cracks in the bowl or cap, badly stripped threads, a bracket bending under your wrench, or a filter head integrated into a more complex manifold that would be costly to replace. If multiple controlled attempts with proper tools and full depressurization have not worked, it is safer to let an experienced technician try than to muscle through and risk water damage.
Special Cases: Stuck Refrigerator And Pitcher Filters
Refrigerator filters and pitcher cartridges require a slightly different playbook, because you are not unscrewing a large external bowl.
Whirlpool’s support documentation walks through several refrigerator filter designs. For quarter-turn filters in the base grille, you normally align the cap vertically, turn it a quarter turn to the left, and pull it out. If the filter is stuck, Whirlpool suggests covering the cap with a cloth and gently turning it with standard pliers, unplugging the refrigerator and removing the bottom grille if needed for better access. They repeatedly caution against applying too much force, because breaking the filter or internal water system could create leaks you cannot see immediately.
Push-button grille filters work differently. You press a button in the base grille until the filter pops out. When these stick, Whirlpool recommends pressing and holding the button while pushing the filter inward and then releasing again. This motion can help the latch disengage. As with quarter-turn filters, unplugging the fridge and removing the bottom grille can provide better angles and leverage.
Internal refrigerator filters often sit behind a small compartment door inside the fresh food section. In one common design, opening the door causes the filter to pop out slightly. If it does not, Whirlpool suggests closing and reopening the door, making sure it opens fully, and relieving line pressure by shutting off the water supply and dispensing several cups of water before trying again. For internal twist-style filters, you usually open the door, turn the filter counterclockwise, and pull it straight out, making sure the door has enough clearance; sometimes removing the shelf below is necessary.
Consumer guides like Water Filter Guru and FL Pure H2O add a few practical details. They recommend fully opening refrigerator doors, dispensing a large cup of water before attempting removal to relieve pressure, and, for base filters, removing the toe grille and using a cloth-covered cap with pliers for extra grip. Again, the theme is controlled leverage combined with good access, not brute force.
Pitcher and countertop cartridges are smaller but can be just as stubborn. Water Filter Guru describes using a simple lever technique for systems like some pitcher filters: sliding a fork handle or similar tool into the housing and pressing against the pitcher body to lift the cartridge straight out. Mineral deposits and tight friction fits are usually to blame. If the whole housing insert is jammed, soaking the area in warm, mildly soapy water and then rinsing thoroughly can make removal easier.
In all of these designs, follow the manufacturer’s instructions for your specific model and avoid improvisations that could crack an internal manifold or housing. Internal parts are often proprietary and expensive to replace.
Preventing Stuck Housings And Protecting Water Quality
The easiest stuck housing to deal with is the one that never seizes in the first place. The same maintenance habits that keep your water tasting clean also keep housings easy to service.
O-Rings, Lubrication, And Tightening Technique
Multiple sources converge on one simple but often skipped step: lubricate O-rings lightly with food-grade silicone grease every time you service the housing. Boshart, Quality Water Lab, and Frizzlife all highlight this practice. A thin, even film on the O-ring and, optionally, on the threads reduces friction, helps the O-ring seat without twisting, improves sealing, and makes the next removal far easier.
Avoid petroleum-based lubricants such as petroleum jelly or general-purpose grease. Boshart’s technical guidance warns that these products can swell elastomer O-rings, dramatically increasing the pressure between the bowl and body and raising the risk of seizing and cracking. Quality Water Lab notes that while general lubricants like multipurpose sprays can sometimes help free stuck threads in a pinch, the preferred, ongoing solution is food-grade silicone specifically designed for O-rings.
Tightening technique matters as well. After you install a new cartridge and lubricated O-ring, screw the bowl on by hand until the O-ring engages and you feel firm resistance. From there, follow the manufacturer’s recommendation, which commonly matches Boshart’s advice of an additional small fraction of a turn with the wrench. If you see a slow drip afterward, depressurize, make sure the O-ring is seated correctly and free of debris, and try again rather than simply cranking harder under full pressure.
Filter Change Intervals And Early Warning Signs
Preventing housings from sticking is closely tied to changing filters on time. Maintenance guides from Just Plumbing, Palm Beach Water Purification, Safewell, Mokher Plumbing, and Frizzlife all stress that cartridges clog over time with sediment, metals, and organic matter. As the University of Georgia’s mechanical filtration research points out, this is partly by design: the “filter cake” that forms on media surfaces helps capture finer particles. But if you let that process run too long, flow and pressure drop significantly.
Early warning signs include reduced water flow or pressure, unusual tastes or odors, cloudy or discolored water, visible sediment, and filter elements darkening from white or clear to brown or black. Just Plumbing, PB Water Purification, and Frizzlife all list these as reasons to check and likely replace filters, even if you have not yet reached a nominal time or gallon rating. In reverse osmosis systems, Frizzlife recommends checking total dissolved solids (TDS) regularly; a sudden rise after the membrane stage signals fouling or membrane failure.
Different systems have different typical intervals. Maintenance guides suggest that whole-house sediment pre-filters often need changing every few months, carbon filters every several months to a year depending on use, and RO pre- and post-filters somewhere in the half-year to yearly range. Rather than treating these numbers as rigid, it is more helpful to combine them with your own observation. For example, if your shower used to fill a one-gallon container in about half a minute and now takes twice that long, your effective flow has roughly halved. That is a clear, real-world cue to inspect your filter and housing.
Changing filters before they are severely clogged reduces the amount of debris and pressure that can weld housings together. It also reduces the window of time for bacteria to colonize paper-based media, an issue highlighted by both the mechanical filtration research and home maintenance guides that warn against letting filters sit beyond their useful life.
Managing Sediment And Temperature
Heavy sediment loads are a common driver of clogged, stuck housings. Quality Water Lab suggests that in homes with sediment-rich water, installing a spin-down prefilter upstream of the main whole-house cartridge can capture larger particles and reduce how quickly the downstream housing clogs and seizes. University of Georgia’s filtration research notes that matching filter pore size and media type to the particle size distribution and turbidity of your water is critical. If you are constantly fighting clogged cartridges and stuck housings, a different filter type or an additional stage may be more appropriate than simply pushing the existing hardware harder.
Location and temperature also matter. Quality Water Lab points out that housings installed in garages or basements that are not climate-controlled are more likely to suffer from cold-induced contraction and even freezing. When water in and around the threads freezes, it can lock housings in place and increase the risk of cracking. When practical, placing housings in areas protected from extreme temperature swings and insulating exposed pipes can reduce these risks.
Finally, materials matter for microbial control. University of Georgia’s mechanical filtration guidance recommends avoiding biodegradable paper media where bacteria can colonize cellulose, favoring non-biodegradable filter media certified by organizations such as NSF or the Water Quality Association and operated according to manufacturer instructions. Choosing robust media and following a clear maintenance schedule keeps your system both easier to service and safer for long-term hydration.
Quick Reference: Causes, Clues, And Prevention
The following table summarizes common stuck-housing scenarios and prevention strategies drawn from manufacturer and plumbing guidance.
Root cause |
How it feels in use |
Typical clues |
Prevention focus |
Trapped pressure |
Housing feels “springy” and resists turning |
Strong spray at pressure-release button |
Always depressurize with valves and faucets |
Overtightening |
Bowl barely moves even with wrench |
History of “really cranking” to stop minor drips |
Hand-tight plus small wrench turn only |
Dry or damaged O-ring |
Sudden seizing after months of normal service |
Visible cracks, flattened ring, past use of wrong lube |
Replace and lubricate with food-grade silicone |
Sediment and carbon buildup |
Cartridge or bowl feels glued in place |
Overdue filter change, low pressure, dark filter media |
Change filters on time, consider pre-sediment stage |
Cold contraction or freezing |
Worse in winter or unheated spaces |
Housings in garage/basement, possible ice in bowl |
Insulate, avoid freezing, warm gently if allowed |
Misalignment or leftover gasket |
Bowl tightens unevenly, leaks when tightened |
Extra gasket at bottom, crooked cartridge |
Check seating carefully every change |
FAQ: Common Questions About Stuck Filter Housings
Q: Is it safe to use general-purpose lubricants like WD-type sprays on a stuck housing or O-ring? A: Guidance from Quality Water Lab notes that multipurpose lubricants can sometimes help free stuck threads, but both Quality Water Lab and Boshart strongly favor food-grade silicone grease for ongoing use on O-rings. Boshart warns that petroleum-based products can swell and damage O-rings, increasing friction and seizure risk. A practical approach is to reserve general-purpose lubricants, if used at all, for the outside of threads during a one-time removal attempt and then thoroughly clean the area and switch to silicone grease before reassembly, always respecting your manufacturer’s recommendations.
Q: Can I just leave a filter in place if the housing is stuck and the water still looks clear? A: That is not a good idea. Maintenance articles from Just Plumbing, Mokher Plumbing, PB Water Purification, Safewell, and Frizzlife all stress that overdue filters can breed bacteria, let contaminants pass through, and strain your plumbing. Mechanical filtration research adds that biodegradable paper media can become a microbial habitat over time. Even if the water appears clear, microscopic changes may be happening. Instead of postponing, treat the stuck housing as a prompt to resolve the mechanical issue and get back on a proper maintenance schedule, or bring in a professional if needed.
Q: Do the same rules apply if I use filtered water for sensitive uses like cleaning nebulizers? A: A patient question discussed on a Mayo Clinic community forum underscores uncertainty about using household filtered water instead of distilled water for respiratory device cleaning. Household filters, especially those with stuck or overdue housings, are not designed to guarantee the level of microbial control needed for medical equipment. For any device that contacts your airways, follow the device manufacturer’s cleaning instructions and your clinician’s advice, which often favor distilled or properly disinfected water rather than relying on point-of-use filters alone.
Caring for your filter housings is really about caring for your water. When you depressurize first, use the right tools, respect the limits of plastic, and keep O-rings and cartridges on a sensible maintenance schedule, stuck housings become rare instead of routine. That means fewer surprises under your sink or in your basement and more confidence that every glass you pour reflects the smart, science-backed hydration choices you are making for your home.
References
- https://stormwaterbook.safl.umn.edu/filtration-practices
- https://www.academia.edu/101100728/Performance_Analysis_of_Water_Filtration_Units_for_Reduction_of_pH_Turbidity_Solids_and_Electricity_Conductivity
- https://digitalcommons.mtu.edu/cgi/viewcontent.cgi?article=1503&context=etds
- https://oaktrust.library.tamu.edu/bitstreams/8e4a1cf3-9b95-4968-ba7e-2770dd7751d9/download
- https://www.nap.edu/read/13303/chapter/6
- https://www.open.edu/openlearncreate/mod/oucontent/view.php?id=80352&printable=1&expandall=1
- https://fieldreport.caes.uga.edu/publications/B1523/mechanical-filtration-methods-and-devices/
- https://www.epa.gov/sites/default/files/2015-10/documents/guidance_manual_for_compliance_with_the_filtration_and_disinfection_requirements.pdf
- https://dspace.mit.edu/bitstream/handle/1721.1/53074/501946335-MIT.pdf?sequence=2&isAllowed=y
- https://extensionpubs.unl.edu/publication/g1492/na/pdf/view

Share:
Understanding Valve Failure Indicators in Smart Home Water Systems
Three Early Signs of Wastewater Pipe Blockage to Watch For